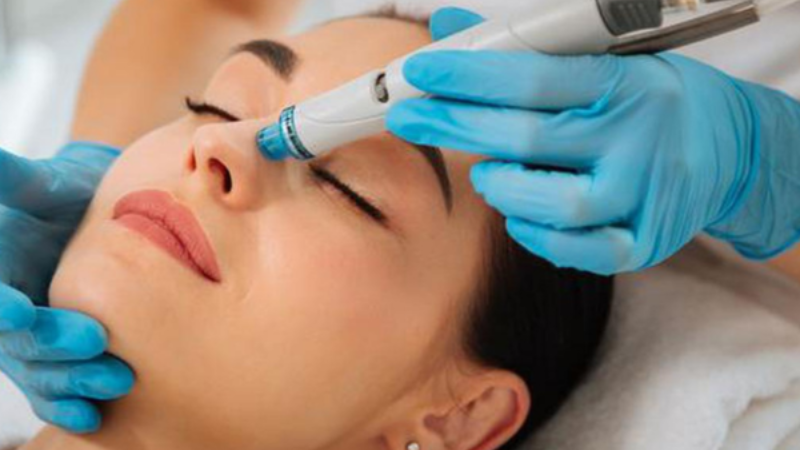
Introduction:
In the pursuit of healthy, glowing skin, exfoliation plays a pivotal role. It helps to slough off dead skin cells, unclog pores, and stimulate cell turnover, revealing a fresh, radiant complexion underneath. While there are numerous commercial exfoliants available in the market, why not opt for a natural, homemade alternative? DIY face scrubs not only allow you to customize the ingredients according to your skin’s needs but also ensure that you know exactly what you’re putting on your skin. So, let’s dive into the world of homemade face scrubs and discover the benefits they offer along with a simple application guide.
Benefits of DIY Face Scrubs:
Gentle Exfoliation:
Unlike some harsh commercial scrubs that may contain abrasive particles, homemade face scrubs often use natural exfoliants like sugar, salt, or ground oats, which are gentler on the skin.
Customizable Formulas:
You have complete control over the ingredients, allowing you to tailor the scrub to your skin type and concerns. Whether you have dry, oily, sensitive, or acne-prone skin, there’s a DIY scrub recipe for you.
Nourishment:

Many homemade face scrub recipes include nourishing ingredients like honey, yogurt, or avocado, which not only exfoliate but also provide moisture and nutrients to the skin.
Cost-Effective:
Making your own face scrub at home is often more budget-friendly than purchasing commercial products. Plus, you can create larger batches to last you longer.
DIY Face Scrub Application Guide:
Now that you’re aware of the benefits, let’s walk through a simple step-by-step guide on how to apply a DIY face scrub for maximum effectiveness:
Step 1: Cleanse Your Face
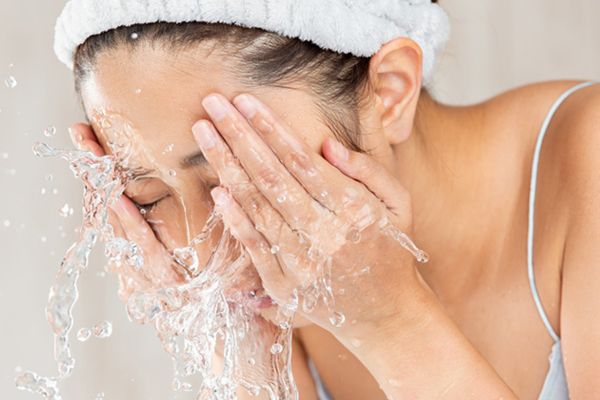
Start with a clean canvas. Wash your face with a gentle cleanser to remove any makeup, dirt, or impurities. Pat your skin dry with a soft towel.
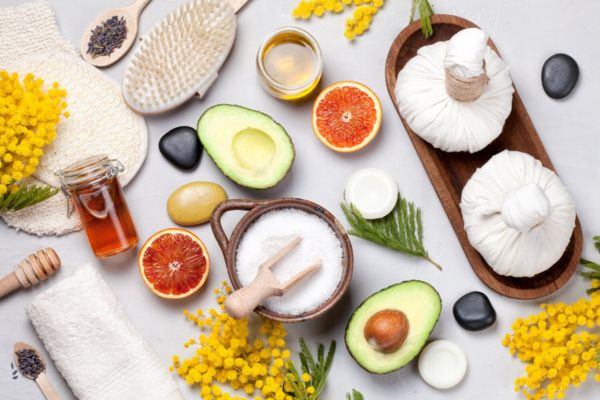
Step 2: Prepare Your Scrub
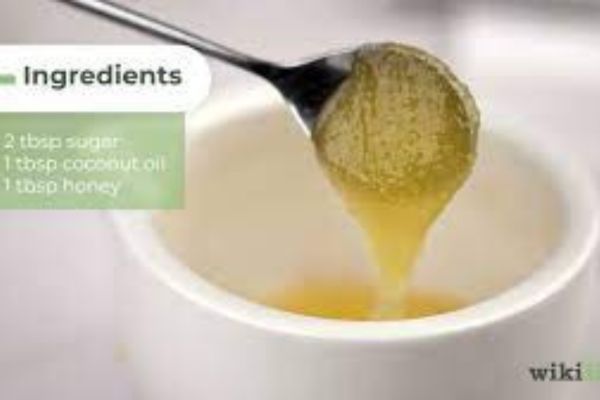
Choose a DIY face scrub recipe that suits your skin type and concerns. Here’s a basic recipe to get you started:
- Ingredients:
- 1 tablespoon of granulated sugar (for gentle exfoliation)
- 1 tablespoon of honey (for hydration and antibacterial properties)
- 1 teaspoon of coconut oil (for moisture)
- Mix the ingredients in a small bowl until well combined.
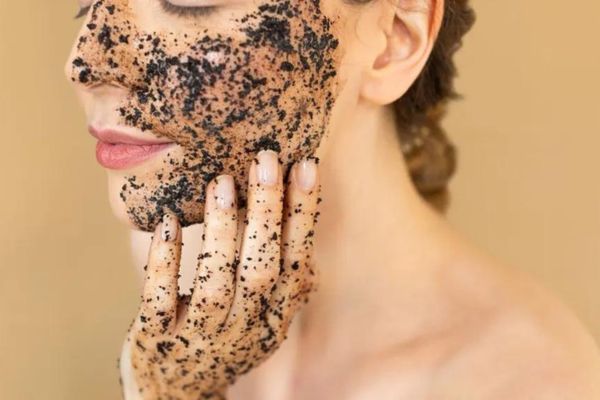
Step 3: Apply the Scrub

Using clean fingers or a spatula, scoop out a small amount of the scrub and apply it to your damp skin. Gently massage the scrub onto your face using circular motions, avoiding the delicate eye area. Focus on areas with rough skin or congestion, such as the forehead, nose, and chin.
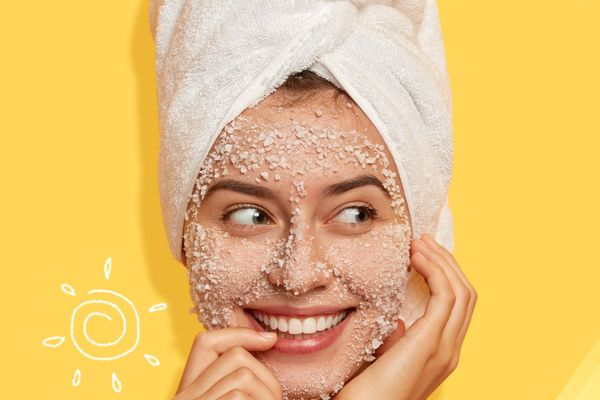
Step 4: Let it Sit
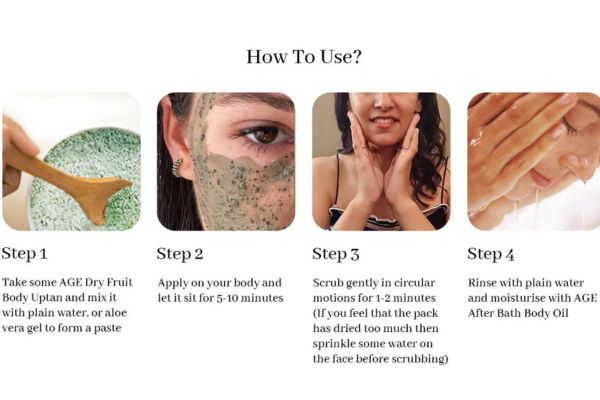
Once you’ve thoroughly exfoliated your skin, allow the scrub to sit for a few minutes to let the nourishing ingredients sink in and work their magic.
Step 5: Rinse Off

Rinse your face thoroughly with lukewarm water, making sure to remove all traces of the scrub. Follow up with a splash of cold water to help tighten pores and refresh your skin.
Step 6: Moisturize
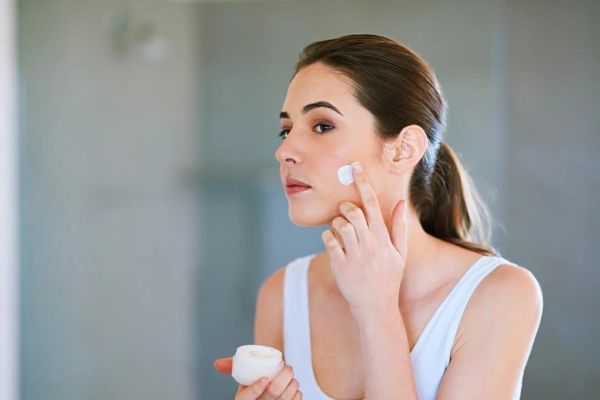
Pat your skin dry with a towel and follow up with your favorite moisturizer to lock in hydration and keep your skin feeling soft and supple.
Step 7: Admire Your Glow

Take a moment to admire your radiant complexion in the mirror. With regular use, DIY face scrubs can help improve the texture and appearance of your skin, leaving you with a healthy, luminous glow.
Conclusion:
Incorporating DIY face scrubs into your skincare routine is a simple yet effective way to achieve glowing, healthy skin. By harnessing the power of natural ingredients, you can customize your scrub to target specific skin concerns while avoiding harsh chemicals and unnecessary additives. So why not treat yourself to a little self-care session and indulge in the rejuvenating benefits of homemade skincare? Your skin will thank you for it!